


Welcome to The Five Days of Christmas! | Day Four
This week will consist of several things: fun, simple projects, recipes and wonderful giveaways! And... an opportunity to share your Christmas blog posts with us!
Today through Friday we are going to have a Christmas Blog Hop going, and we would love for you to share your blog! Make sure to follow the guidelines for the hop. Make sure to thank the link participants when you visit their blog! And always read to the very bottom - you never know what you might find!
This part is really going to be fun...
Old Time Radio Theater!
Every day we will include:
A story a day, all from 1939-1947! 30 minutes to an hour long and perfect for the little ones to have a break from modern media.
MP3 format. Right-click the link - choose SAVE LINK AS and download to your computer. Enjoy as you would any other MP3!
Today's audio story:
~~~~~~~~~~~~~~~~~~~~~~~~~~~~~~~~~~~~~~~~~~~~~
Yesterday's Giveaway winner was Ilka J.!
Today's Giveaway
You have a chance to win a...
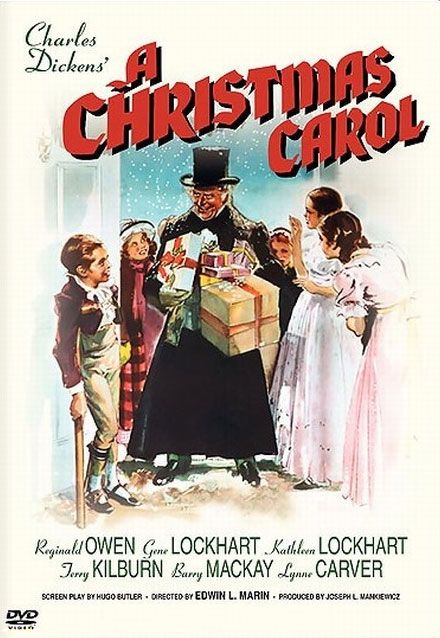
A Christmas Carol, DVD (1938)
This is one of our family's favorite versions of A Christmas Carol!
Welcome to The Five Days of Christmas! | Day Four
This week will consist of several things: fun, simple projects, recipes and wonderful giveaways! And... an opportunity to share your Christmas blog posts with us!
Today through Friday we are going to have a Christmas Blog Hop going, and we would love for you to share your blog! Make sure to follow the guidelines for the hop. Make sure to thank the link participants when you visit their blog! And always read to the very bottom - you never know what you might find!
This part is really going to be fun...
Old Time Radio Theater!
Every day we will include:
A story a day, all from 1939-1947! 30 minutes to an hour long and perfect for the little ones to have a break from modern media.
MP3 format. Right-click the link - choose SAVE LINK AS and download to your computer. Enjoy as you would any other MP3!
Today's audio story:
MP3 format. Right-click the link - choose SAVE LINK AS and download to your computer. Enjoy as you would any other MP3!
Today's audio story:
Yesterday's Giveaway winner was Ilka J.!
Today's Giveaway
A Christmas Carol, DVD (1938)
This is one of our family's favorite versions of A Christmas Carol!
Starbucks Holiday Blend Coffee...

and a 2013 Seasons at Home Magazine Subscription!
~~~~~~~~~~~~~~~~~~~~~~~~~~~~~~~~~~~~~~~~~~~~~
Ornament Traditions
by Theresa PowersNot only can you make memories, siblings can make ornaments that express personality, and get really creative. It's a wonderful way to give to each other! We write down names and have each child choose a name, mom and dad participate too. We usually do this on Thanksgiving Day after we eat.
Here is a selection of ornaments we've made for the tree this year.
First, let's talk about walnuts. You can really get creative with them! But splitting them in half so both halves are useable is a challenge. Note: Always check the walnuts for blemishes or cracks before buying - and the cost for about 6 walnuts is less than $1! That will give you 12 halves if you don't mess up.
Here is what worked for us:
Preheat the oven to 250 degrees and toss the whole walnuts into a pan. Bake for about 20-25 minutes. When you can pick one up, take a sharp knife (mom or dad only), and put the knife on the slit and push gently down some. Give the knife a sharp push down, BE CAREFUL! The nut should fall cleanly in two. My 15-year-old daughter figured this out, after I destroyed several walnuts. Note the rubber, it works to hold the slippery thing in place.

aww...
"Born This Day..."
This an easy ornament, the children will love this!

Supplies:
1/2 walnut shell
24 gauge wire (I found red!)
1 Hazelnut
Cotton ball and triangle scrap of fabric
Colored cardstock/printer
Fine marker
Hot glue gun
Paint or stamp pad - gold
1. Make a tiny face with the marker on the hazelnut. I just did closed eyes and tiny mouth. Glue the head to the pointed side of the nut. Cut a length of wire to hang, and glue each end inside.

2. Pull the cotton ball in half. A whole one was too much. Wrap your cotton ball like a little present, and glue - while hot, tuck inside the nut so it sits nice and cozy. Use a toothpick to 'adjust it around'. It should fit snug but loosely like a blanket.
3. Print out on card stock Born This Day in Bethlehem. I made an image .5" high and 2" long and put the text on it. I cut it out and trimmed the edges with decorative scissors.
4. Now, take some raffia and tie it in the middle with another piece, making a sort of bow. You want to sandwich the wire between the sign and the raffia on the back. I just laid the raffia down, ornament with wire on that, put hot glue on, and pressed onto the sign. Just do it carefully with minimal glue! You can always add a little more from the back.

4. Cut out a star and paint it gold. I cut part of the star, then stamped it and finished cutting. It was easy. Glue onto the front! All done!

Always write the year somewhere on your ornament. I wrote ours on the bottom of the walnut.

Bell Hanger
Bell hangers are expensive! These are easy to make, use a coupon when you buy the bells!

You'll Need:
Wire from first project
Bell - ready to hang
Pinecones - We found our outside, easy in Colorado! You may need to purchase some.
Wire from first project
Bell - ready to hang
Pinecones - We found our outside, easy in Colorado! You may need to purchase some.

1. Glue two large pinecones together, one sitting a little higher than the other.

2. You want to glue the hangers from the bells to the pinecones, staggering the height of each. Hang as many as you want.

3. Use the wire from your last project and cut a long length for the hanger. Take one end and wrap around the inside one pinecone, bring back to the wire and twist. Repeat for the other side. How easy is that? You're done! If you make a mess with the glue just wait until it's dry and pick off. I had an after thought on this - brush some fake snow on the ends. How pretty!
Christmas Ribbon Trees

For each ribbon tree ornament, you will need:
16" silk embroidery ribbon (available at Joyous Home)
Size 8 embroidery needle, or a needle thin enough to fit through a seed bead, or other petite
19" of 3/4" wide crafting ribbon
11 pearly beads
2 seed beads or other very petite bead (found in the embroidery section of the craft store)
On one side of the 19" piece of ribbon (the wrong side if the ribbon is not double-sided) Make a single dot in the center of the ribbon 3" from the end. Make another dot 2 3/4" away from this dot. Continue, spacing each dot after at these points (specified below), stopping at 1".
2 1/2", 2 1/4", 2", 1 3/4", 1 1/2", 1 1/4", 1"
1. Thread the embroidery needle with the silk ribbon and knot the end with a single tight knot. Slide one seed bead over the needle and pull to the end of the ribbon so that sits on the knot.
2. Start with one pearly bead. Slide down to meet the other seed bead. With the wrong side of the ribbon facing you, bring the needle up through the first marked dot, from the right side of the ribbon, pull through.


3. Add another pearly bead. Insert the needle through the next dot as shown, pull through and then add another bead...
4. Continue the pattern until you finish with the last dot; top with one last pearly bead and the last seed bead on top of this.


5. To make the ribbon loop and finish off - run the needle through the ribbon at the top of the bead as shown. Pull through until a loop forms, stop when it's the right size.
Run the needle back through from the opposite side; pull through, but stop right before the loop closes, and pass the needle through the loop, then pull until tight and snug. This will complete a knot. Clip the ribbon.


6. Trim the ribbon on the top and bottom of the tree, and finish off with a triangular cut into the ribbon end. Finished!


Have fun making traditions!
~~~~~~~~~~~~~~~~~~~~~~~~~~~~~~~~~~~~~~~~~~~~~
Now for the giveaway and blog hop!
Follow the steps in the Punchtab box below to enter the giveaway. You need to be a newsletter subscriber in order to qualify to win. By entering the giveaway, you are agreeing to receive emails from Joyous Home. The winner will be notified by email.
We shared on:

No comments:
Post a Comment