


We have had a very busy Christmas season, but we have enjoyed all of it! So many things to finish to wrap up the old year, and then even more things to do for the new year ahead. We always seem to have more ideas than we have time in each day. I wish we could have a four more hours in each one! God is very gracious though, as we tackle each day, one at a time.
There is always something very pleasant in the two weeks after Christmas. As much as we look forward to the special seasons of Thanksgiving and Christmas, as soon as January comes around, we start thinking about all of the things we want to do for the Spring! Colorado is wonderful, we can look forward to our Spring slowly and still enjoy lots of snow in January and February, and sometimes all the way through April.
We are going to make garden plans early this year and start all of our seeds indoors over the next few weeks. We started just a little late last year (we can't plant safely until the very end of May), so our harvest was late coming and our broccoli was snowed on twice before it was even near ready in the Fall!
We bought tons of flower bulbs that were on sale in November and the children planted them all over the yard for us before Thanksgiving. We can't wait to see what starts blooming when the weather warms! There should be beautiful Tulips and Daffodils popping up everywhere!
In kitchen creative news, I received a yogurt maker for Christmas. I've wanted one for months, I was so excited to try it! It's the Euro Cuisine Yogurt Maker. The yogurt came out quite tasty, but I'm going to be making lots of yogurt over the next few weeks attempting to perfect it.
I love yogurt! I've always been a bit of a yogurt critic. When I was little, Mom used to buy the individual yogurt cups for my brother and I, the good yogurt. It was a thick, almost custard-style yogurt; very tasty and it was my very favorite. I could never stand the cheap, odd-flavored, multicolored yogurts. Just plain gross. It was to my shock and horror a few years ago that the yogurt companies started packaging this stuff into plastic tubes you could squeeze into your mouth.
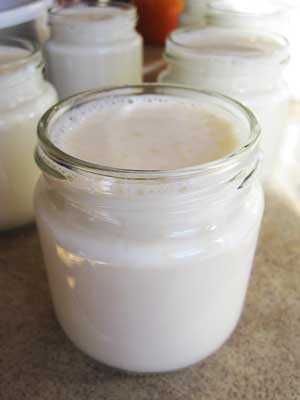
I took some pictures of my first batch! I've made yogurt before for our magazine, but I used the crock pot and mason jar method, which does work. It is still my opinion that having the yogurt maker keeps the process simpler, and the equipment at a minimum. I had to wrap the jars in towels and watch it very closely in the crock pot. In the yogurt maker I can make the yogurt and then forget about it while I work on other things. That's always a plus!
For my first batch, I made peach yogurt with some of the peach preserves we had made in the summer. I will tell you some of the things I found!
~ I didn't use Organic milk, but I did get a good natural, no-funny-hormones 2% milk. You can use any kind of milk, including non-fat to make yogurt, but we don't drink or use whole milk and none of us like watery, fat free milk, so 2% it was. You need a little less than 1 quart.
~ You need yogurt culture to make yogurt. I've never tried a powdered starter, I've always used a good, plain yogurt to start mine. I bought some Greek yogurt because it's thicker and I was in the hopes that it would produce a thick yogurt. I'm not sure if it works like that though! For the one quart of milk, I used a 5.3oz. container of Greek yogurt. I was looking for a full 6oz., but the 5.3oz was enough.
So all you need for yogurt is: 1 quart of milk and one 5.3oz-6oz container of plain yogurt.
The one rule before I show you anything else is, you must have very clean pots, measuring cups and utensils. They must be washed out with mild dish soap and rinsed well with hot water. Dry them with clean cloths and lay out on clean dish towels. For a quick list of what you should have washed: Large glass pitcher or bowl, small glass bowl or measuring glass, whisk, spoon (not wood) and of course all of your yogurt jars.

Moving on, heat the milk! In your clean pot, add the scant-less quart of milk. Heat over high heat stirring constantly until the milk is boiling and climbing the sides of the pot. Boil for 1 minute. Boiling it this way is supposed to make a thicker yogurt, but is not completely necessary. I'm still learning all of the different methods, and need-to's vs. don't need-to. I love thick yogurt, so I boiled it!

An extra side note on this (and why I have no pictures of this step): I am a multi-tasker. This is often accompanied by disastrous results. I do not have a picture of the milk boiling because my milk had the nerve to start boiling behind my back and boil all over the oven. I didn't lose much of the milk, but I wondered if this accident made my yogurt thick, but a little grainy, I'm still troubleshooting this part. Lesson learned- Don't turn your back ladies! Take notice that I told you to stir constantly. As an extra funny, 3 year old Evie walked into the kitchen while I was running for the pot and said, "Oh boy, you're making noodles!" Oh my. Does that happen often when I make noodles, sweetie?
If you don't want to boil the milk, just heat it to 180 degrees, or leave it room temperature but it has to be pasteurized milk if you don't heat it at all, so I've read. I'm not sure about raw milk, I haven't looked into that. Once the milk has boiled or heated, pour the milk into a large, clean glass pitcher. Now it's time to bring the temperature of the milk down. To do this quickly, place the glass pitcher in an ice water bath. You need to keep an eye on this part, because the temperature drops quickly. It helps to keep stirring the milk, with your thermometer ready to keep checking the temperature. Bring the milk down to 110 degrees.


Pour this mixture back into the milk. I added the peach preserves to this mixture. I added about 1/2 cup. I think the next time I will add the preserves to the individual jars instead because the peaches sort of stayed at the bottom of the pitcher and I had trouble distributing them to each jar. You can also sweeten with raw honey, sugar or seedless jam! Another good reason to do it this way: You can leave one whole jar plain so you have a starter for another batch of yogurt! You can't start yogurt with flavored yogurt, it's supposed to be plain.


Stir in well and divide the yogurt mixture between the washed jars. Place the jars without the lids in the yogurt maker and turn it on. The Cuisine yogurt machine has an automatic shut-off. So set the timer for somewhere between 6-8 hours. My yogurt only took about 6 hours and was done. This seems to be a personal opinion of when it's done though, you can let incubate for up to 15 hours. The yogurt can be considered done when it's set and jiggly in the middle. I might let it go longer next time for a stronger flavor and see if it gets a little thicker. So many things to try!


When it's done, refrigerate and enjoy! For those of you who don't know, the clear liquid that collects on top of the yogurt is called whey, and it's good for you, don't throw it away! Just stir it in.
I will continue to try some different things and post here about what I'm learning. If anyone has experience with yogurt making, I would love to hear some ideas about making it thick, and preventing the grainy texture. I also wondered if I know you can add powdered milk to make it thicker, so I will try that next time! I'm also going to try making yogurt cheese and see how that tastes.
Have a wonderful, first week of the year! Make it a productive one! ~Jessica
16 comments:
Hi~
I don't know about the grainy, I always use whole milk so I do not have that particular issue. But to get thicker yogurt is very easy... once the yogurt is "done" you strain it through a cheesecloth/sieve. The longer you let it sit draining (in the fridge), the thicker it will be (indeed, if you want to make a cream-cheese-like product or the base for tzazitki, let it go until super-thick!). Be sure to catch the whey and use it in breads & soups!
We bought Bakers & Chefs flour sackcloth Item #46721 from Sam’s Club. Then we place one of the sackcloth inside a stainless steel strainer, then that inside a large stainless steel bowl. We tie all 4 corners up and place in the refrigerator for about 2 days. It will drain the whey off which we use for making bread; it also makes the yogurt real creamy & thick. We also use raw milk. We don’t have a “graininess” to ours, I am assuming it’s because we “stain’ it, but don’t know that for sure.
I do have a question. What are the jars you are using? They don't appear to be typical "canning jars".
Thank you both! I'll give it try. I did wonder though, does removing the whey also take away most of the nutritional quality of the yogurt? If that's the case, I might be more willing to have thinner yogurt! ;)
Mrs. Phelps, the jars I'm using come with the yogurt maker. It makes seven 6oz. jars, which is not a lot for our family, but I didn't mind the capability to make a few different kinds of yogurt. I think in the near future I will be purchasing the 2qt. yogurt maker by Euro Cuisine. What do you all use?
~Jessica
Hum that is a good question... which I assume anytime you take something from something it won't be as nutritional. I do like the taste of our bread better when we use the whey verses not using the whey. I use Mason or Ball quart canning jars. We actually make ours plain then everyone throws in their favorite stuff ie: nuts, raisins, fruit ect... we also stir it in our oatmeal for breakfast as well.
Hmmm... don't know about the nutrition but tend to agree with Gary... but on the other hand, you might be "removing" it from the yogurt, but if you are "adding" it to the bread/soup, then you are still gaining benefit! Like Gary, I make it plain and add any extras later. Also, I guess by using the whole milk, I don't usually need to strain it much if at all to get a nice thick result... it's also possible if you use one of the organic yogurts you will get a variety of cultures that will thicken more naturally as well, it's worth trying different ones to see which gives you the result you are looking for.
As for process, I do not use an 'official' yogurt maker. We have a 2-piece thermal casserole unit designed for use on a boat that holds temperature for up to 12 hours... I place the mixture into a 2-quart storage container that fits perfectly right into the casserole unit.
We also have one of those oven thermometers (usually used for roasts) that have the remote probe. I will place the probe in with the yogurt mixture just to make sure the temperature holds steady. Perfect every time!
Shirley I do have a couple of questions I would like to ask you but don't have time to post. Can I try to catch up with you say on Monday? By the way... this is Gary's wife, Diane. Thank you for sharing!
Certainly, anytime. ~Shirley
I haven't made yogurt in 3 months and lost my directions! I am bummed because I have tried it many ways, found the one I liked and was successful at, moved, and lost my notes! Do you use a stock pot and bring your milk to a certain temp? Then cool it to 110 and let it rest there for so long? Maybe the simplest way would be...can you share how you make it? I used the crock pot method but it was too much trouble.
Hi Mrs. Phelps,
I heated the milk until it boiled, and then I let it continue to boil for about one minute. You don't have to let it boil according to my recipe. Boiling it was supposed to make it thicker. Instead of boiling it, you can heat it to 180 degrees and then remove it from the heat. Cool the milk to 110 degrees and then immediately stir in your yogurt culture. As soon as that's done, I poured the mixture into the jars and begin the incubating time.
Hope that helps! The proportions of milk and yogurt I used for the starter in the post here was from the recipe I received with the machine =)
I did make yogurt in our Spring 2009 magazine, do you have that one? That recipe works well too.
Have a good day! Jessica
As for me, my process is pretty much just as written above, except I clip a candy thermometer to the pan and only bring just to point of boiling.
Once the heating portion of the activities are complete, I pour the heated milk into the plastic container (e.g., rubbermaid or tupperware) and again clip the candy thermometer to the side. I do not put the lid on it. I let it cool on its own, as I have the problem of it cooling too much if I use the ice bath (the cooling process continues, and since I am not using a warming unit, it makes a difference).
Once the milk has cooled to the 110 degrees, I remove the candy thermometer and add the 2 tbsp of yogurt by spooning it carefully into the hole left by the thermometer, being careful not to disturb the skin that has formed. I do not stir it.
I put the lid on the plastic container, and place that container down in our thermal casserole unit (again, it is like a big "thermos", it is not electric or battery-powered so it is not temperature controlled). [As mentioned above, I will usually put in the probe from a remote thermometer down in the plastic container before placing into the casserole unit - inserting into that same hole left by the candy thermometer - to monitor that the temp stays as expected.]
I leave it on my kitchen counter for 8-10 hours.
@Shirley How much milk do you use? 2 Tbsp. didn't seem like much! I think my mind is thinking that a little more yogurt starter will make a thicker yogurt. Any opinions on that?
Jessica
I usually am making a quart - so 1 quart of milk and 2 tbsp of yogurt. The concept is the same as any other starter you may have used, like sourdough or the Amish "Friendship Bread" ... those little culture creatures do a good job, and more is not necessarily better, they grow & multiply by eating the sugars & fats in the milk.
(which I guess is the reason why the original recipe I found indicated that if you are using non-fat milk, to be sure to use at least 2 tbsp of whole-milk mixed in with the yogurt starter... so the little guys have something to eat!).
@Shirley That makes sense. I suppose it always seems to make more sense to add more culture, it *must* do something, right? ;) I never use non-fat milk. I don't understand why all of the yogurt in the store is obsessively ALL non-fat, I love to use at least 2%.
Thanks for answering! ~Jessica
Sorry I have been so sick. Thank you both for the information. I can go back to figuring out how I did it! And I found it in the magazine. Thank you so much!
We use milk from a farm for our yogurt and also make ou own crackers. My yogrt reciep was put on my blog last year. do come over!
Post a Comment