Google+
Holiday Crafts & Recipes! Embroidery Tutorials Recipes for Desserts & Sweet Treats Dinners & Sides Tea and Coffeetime recipes! Like Joyous Notions on Facebook! Connect with Us! Contact Us! Home Join Our Blog Hops!
Shop Joyous Home!
The Homemakers's Resource Guide on Joyous Notions
Showing posts with label Tutorials. Show all posts

Wednesday, December 4, 2013

The Five Days of Christmas | Day Four | Ornament Day

Welcome to The Five Days of Christmas! | Day Four

This week will consist of several things: fun, simple projects, recipes and wonderful giveaways! And... an opportunity to share your Christmas blog posts with us! 

Today through Friday we are going to have a Christmas Blog Hop going, and we would love for you to share your blog! Make sure to follow the guidelines for the hop. Make sure to thank the link participants when you visit their blog! And always read to the very bottom - you never know what you might find!


This part is really going to be fun... 

Old Time Radio Theater!

Every day we will include:
A story a day, all from 1939-1947! 30 minutes to an hour long and perfect for the little ones to have a break from modern media.

MP3 format. Right-click the link - choose SAVE LINK AS and download to your computer. Enjoy as you would any other MP3! 

Today's audio story:

~~~~~~~~~~~~~~~~~~~~~~~~~~~~~~~~~~~~~~~~~~~~~
Yesterday's Giveaway winner was Ilka J.!


Today's Giveaway

 You have a chance to win a...

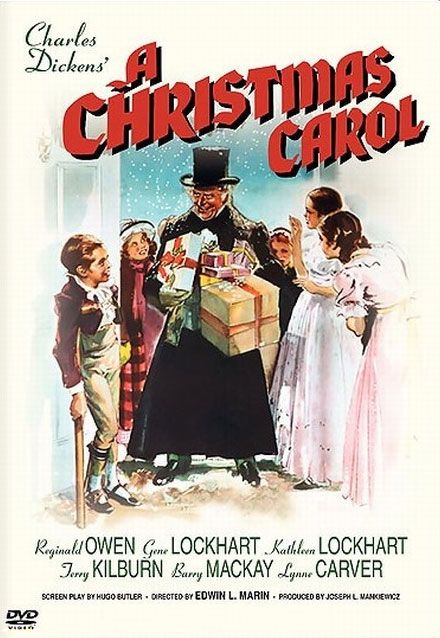
A Christmas Carol, DVD (1938)
This is one of our family's favorite versions of A Christmas Carol!
Starbucks Holiday Blend Coffee... 


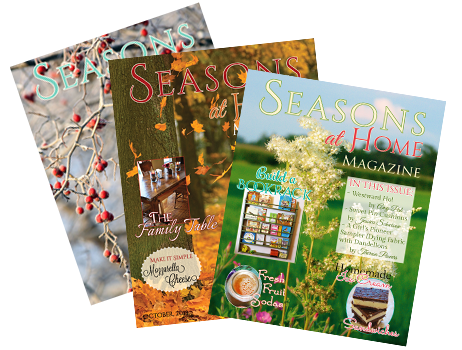
and a 2013 Seasons at Home Magazine Subscription!

~~~~~~~~~~~~~~~~~~~~~~~~~~~~~~~~~~~~~~~~~~~~~

Ornament Traditions

 by Theresa Powers

Ornament sharing is one of the best traditions we have started in our family. I love ornaments. Years ago, we were invited to a friend's home for Christmas. Their children were well grown with families of their own. Upon seeing her tree, I was fascinated!  I didn't know any of their children, but you could almost know them just by looking upon that tree. I looked at each one and could see so many loving memories she had to gaze upon. Little hands, quotes, pictures, sewn objects by a beginner -there were so many things, the tree couldn't fit another ornament. I decided then, our children would make ornaments every year for our tree, and for each other, when they could.

Not only can you make memories, siblings can make ornaments that express personality, and get really creative. It's a wonderful way to give to each other! We write down names and have each child choose a name, mom and dad participate too. We usually do this on Thanksgiving Day after we eat.

Here is a selection of ornaments we've made for the tree this year.

First, let's talk about walnuts. You can really get creative with them! But splitting them in half so both halves are useable is a challenge. Note: Always check the walnuts for blemishes or cracks before buying - and the cost for about 6 walnuts is less than $1! That will give you 12 halves if you don't mess up.


Here is what worked for us:
Preheat the oven to 250 degrees and toss the whole walnuts into a pan. Bake for about 20-25 minutes. When you can pick one up, take a sharp knife (mom or dad only), and put the knife on the slit and push  gently down some. Give the knife a sharp push down, BE CAREFUL! The nut should fall cleanly in two. My 15-year-old daughter figured this out, after I destroyed several walnuts. Note the rubber, it works to hold the slippery thing in place.


aww...


"Born This Day..."
This an easy ornament, the children will love this!


Supplies:
     1/2 walnut shell
     24 gauge wire (I found red!)
     1 Hazelnut
     Cotton ball and triangle scrap of fabric
     Colored cardstock/printer
     Fine marker

     Hot glue gun
     Paint or stamp pad - gold

1. Make a tiny face with the marker on the hazelnut. I just did closed eyes and tiny mouth. Glue the head to the pointed side of the nut. Cut a length of wire to hang, and glue each end inside.


2. Pull the cotton ball in half. A whole one was too much. Wrap your cotton ball like a little present, and glue - while hot, tuck inside the nut so it sits nice and cozy. Use a toothpick to 'adjust it around'. It should fit snug but loosely like a blanket.


3. Print out on card stock Born This Day in Bethlehem. I made an image .5" high and 2" long and put the text on it. I cut it out and trimmed the edges with decorative scissors. 

4. Now, take some raffia and tie it in the middle with another piece, making a sort of bow. You want to sandwich the wire between the sign and the raffia on the back. I just laid the raffia down, ornament with wire on that, put hot glue on, and pressed onto the sign. Just do it carefully with minimal glue! You can always add a little more from the back.


4. Cut out a star and paint it gold. I cut part of the star, then stamped it and finished cutting. It was easy. Glue onto the front! All done!


Always write the year somewhere on your ornament. I wrote ours on the bottom of the walnut. 


Bell Hanger
 Bell hangers are expensive! These are easy to make, use a coupon when you buy the bells!


You'll Need:
    Wire from first project
     Bell - ready to hang
     Pinecones - We found our outside, easy in Colorado! You may need to purchase some.


1. Glue two large pinecones together, one sitting a little higher than the other. 


2. You want to glue the hangers from the bells to the pinecones, staggering the height of each. Hang as many as you want.


3. Use the wire from your last project and cut a long length for the hanger. Take one end and wrap around the inside one pinecone, bring back to the wire and twist. Repeat for the other side. How easy is that? You're done! If you make a mess with the glue just wait until it's dry and pick off. I had an after thought on this - brush some fake snow on the ends. How pretty!

Christmas Ribbon Trees


For each ribbon tree ornament, you will need:
     16" silk embroidery ribbon (available at Joyous Home)
     Size 8 embroidery needle, or a needle thin enough to fit through a seed bead, or other petite
     19" of 3/4" wide crafting ribbon
     11 pearly beads
     2 seed beads or other very petite bead (found in the embroidery section of the craft store)


On one side of the 19" piece of ribbon (the wrong side if the ribbon is not double-sided) Make a single dot in the center of the ribbon 3" from the end. Make another dot 2 3/4" away from this dot. Continue, spacing each dot after at these points (specified below), stopping at 1".

 2 1/2", 2 1/4", 2", 1 3/4", 1 1/2", 1 1/4", 1"

1. Thread the embroidery needle with the silk ribbon and knot the end with a single tight knot. Slide one seed bead over the needle and pull to the end of the ribbon so that sits on the knot.

2. Start with one pearly bead. Slide down to meet the other seed bead. With the wrong side of the ribbon facing you, bring the needle up through the first marked dot, from the right side of the ribbon, pull through.


3. Add another pearly bead. Insert the needle through the next dot as shown, pull through and then add another bead...

4. Continue the pattern until you finish with the last dot; top with one last pearly bead and the last seed bead on top of this.


5. To make the ribbon loop and finish off - run the needle through the ribbon at the top of the bead as shown. Pull through until a loop forms, stop when it's the right size.

Run the needle back through from the opposite side; pull through, but stop right before the loop closes, and pass the needle through the loop, then pull until tight and snug. This will complete a knot. Clip the ribbon.


6. Trim the ribbon on the top and bottom of the tree, and finish off with a triangular cut into the ribbon end. Finished!  


Have fun making traditions!

~~~~~~~~~~~~~~~~~~~~~~~~~~~~~~~~~~~~~~~~~~~~~

Now for the giveaway and blog hop!

Follow the steps in the Punchtab box below to enter the giveaway. You need to be a newsletter subscriber in order to qualify to win. By entering the giveaway, you are agreeing to receive emails from Joyous Home. The winner will be notified by email. 


We shared on: Proverbs 31 Link Up

Tuesday, December 3, 2013

The Five Days of Christmas | Day Three | Tonya Chapa, Traditions | Moss Planters

Welcome to The Five Days of Christmas! | Day Three

This week will consist of several things: fun, simple projects, recipes and wonderful giveaways! And... an opportunity to share your Christmas blog posts with us! 

Today through Friday we are going to have a Christmas Blog Hop going, and we would love for you to share your blog! Make sure to follow the guidelines for the hop. Make sure to thank the link participants when you visit their blog! And always read to the very bottom - you never know what you might find!


This part is really going to be fun... 

Old Time Radio Theater!

Every day we will include:
A story a day, all from 1939-1947! 30 minutes to an hour long and perfect for the little ones to have a break from modern media.

MP3 format. Right-click the link - choose SAVE LINK AS and download to your computer. Enjoy as you would any other MP3! 

Today's audio story:

A Stable in Bethlehem Pennsylvania, 1944 - 1 hour

~~~~~~~~~~~~~~~~~~~~~~~~~~~~~~~~~~~~~~~~~~~~~~~~~~

Yesterday's Giveaway winner was Janice P.!


Today's Giveaway


 You have a chance to win a...

Fruitful Vine Creations Design! ~ O Holy Night  


 A $29.00 Value! 

We love Tonya's wall creations - simply beautiful! This design is 20.5" x 10" and the winner will receive a certificate via email to redeem their prize on Tonya's site - AND they can choose which color they want for the lettering!


and don't forget...
One 2013 Subscription to Seasons at Home Magazine! 


~~~~~~~~~~~~~~~~~~~~~~~~~~~~~~~~~~~~~~~~~~~~~~~~~~~~~~~~~


Traditions
by Tonya Chapa

It's the most wonderful time of the year! Time for the Christmas music, trimming the tree, Christmas shopping...
I'm not sure if it is because we moved so much over the years, and we wanted some sort of continuity for our children, or if it would have been this way anyway, but over the years we have collected traditions that remind us of our special days.
On birthdays, we hang balloons outside of our children's bedroom doors with a balloon for each year that they are celebrating (3  balloons for our 3 year old, 15 for the 15 year old, and so on). Of course, if I didn't know the kids got into the balloons and I only have 11 left but don't realize it until midnight, the 17 year old only gets 11. Hate it when that happens!  This comes from Daddy always saying, "yes," and Mommy not hiding the balloons very well. But I digress...
Another tradition we have is birthday/anti-birthday dinners. Daddy takes them out for their birthday dinners at some point, and I take them out 6 months later for their anti-birthday. We each get a one-on-one dinner with each of the children at least once a year. Kids get to pick where we eat. It's fun moving from a restaurant with a play place to one without. Seeing them move from the kids' meals to fancy fare is such a welcome!
At Christmas, I make a big deal about not playing Christmas music until after Thanksgiving. This year was especially difficult because Thanksgiving came so late. I tweaked it a bit and conceded to allow it after the Canadian Thanksgiving. I have some who groaned, and some who were delighted at the earlier playing of their favorite carols.
We try to trim the tree on Thanksgiving weekend at some point. Some years it is nearly impossible to get all the children home at the same time to enjoy this tradition. We managed to have the five who still live at home all here that weekend, so we went with it. We also enjoyed one of our other holiday season traditions: fondue!  Do you ever fondue? Oh, it is great fun. We have three courses: cheese, meat, dessert. The kids (and adults!) have so much fun dipping various breads, vegetables, fruit, cookies, etc. into the cheeses and chocolate. Oh, and we have sparkling cider with it! Such a fun treat.

When we travel during the year, we hunt for Christmas ornaments for our tree. We love to have keepsake ornaments  from all the various places we visit. Each year as we unpack the ornaments, the children delight over the old memories from years past. And I scramble to remember where I stashed this year's ornaments since they didn't get out when we took the tree down last year.
And each year, we have the maddening "cheap lights don't work this year! Ugh! We have to take them off the tree and run out last minute and buy more lights, but never quite enough lights" tradition. {We think we are brilliant by not taking them off the tree each year, but instead store the tree all assembled, lights and all, in our storage room in the basement.} I tend to keep busy in the kitchen, my husband does yet another google search for one of those fiber-optic lighted trees for THIS year, and the sons are left to duke it out with the tree. At some point, we get the call to come examine the tree to see if the lights were done well. Ah! Perfection! See, that wasn't so stressful!
It's true, Christmas can feel like a lot of work, particularly for mothers. But when you look back on all the Christmases in your life, you'll find you've created family traditions and lasting memories. Those memories, good and bad, are really what help to keep a family together over the long haul. 
- Caroline Kennedy
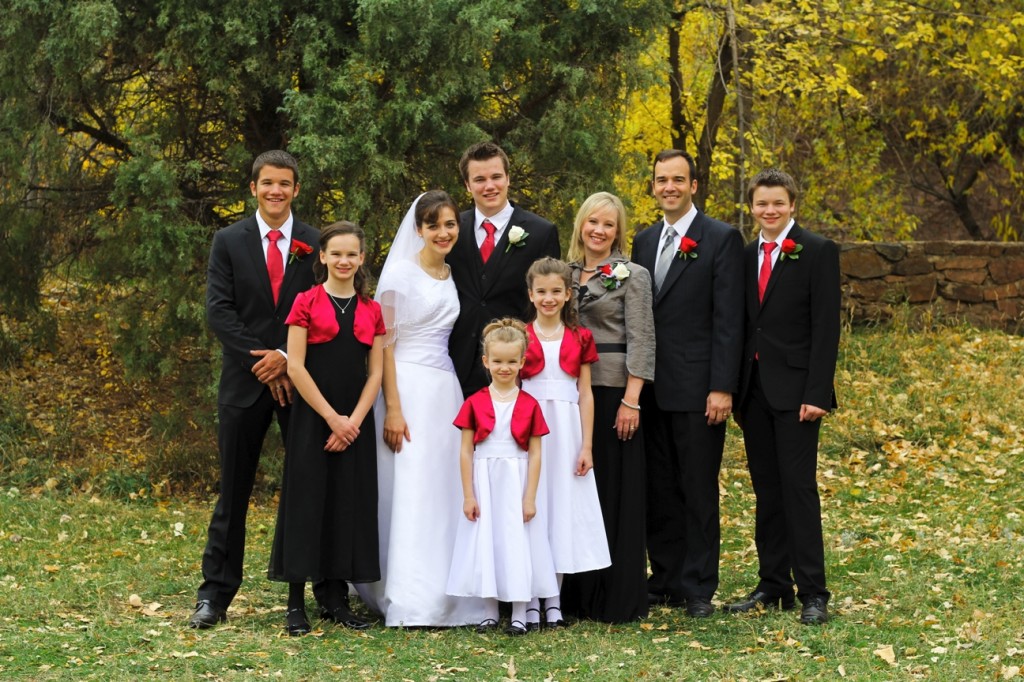
We also have the tradition of getting the Christmas card out before Valentine's day. And we remember that we had planned on getting our pictures taken in the Autumn with the beautiful colors this year to go on the card. So, we decide that in 15 minutes from now, we need to all be ready, coordinated in wardrobe, smiles on, good hair for the perfect Christmas card photo. I always just hope that this day falls on a Wednesday or Thursday because all the laundry should be done and ironed by then for the week. Catch me on the wrong day, and we may have a coordinated naked family picture. Not really, but it might be the only thing that actually matches and doesn't need ironing. Although... if you look closely, you might disagree.
But seriously, we love our traditions. As quirky as they may seem to people on the outside of our little family. And I like to think that the kids love the traditions, too. They know what to expect. And they delight in it. I want them to have a strong bond with their family after they are grown and married and are starting their own families. I wonder which traditions they will keep, which they will ditch, and what they will adopt  from their spouses' families. Because they will be a unique family, although connected to ours.
And I love to hear the memories that they share. And the things they expect. And the bonds that are so strong that are demonstrated by the silly things and the serious things. I wonder what our grandchildren will know about us after we are gone because of the traditions we shared with their parents. And I smile at the thought of it all.
My prayer is that the tradition of reading the story of the birth of Christ to the children on Christmas Eve will remain for a thousand generations. And the love that we have for this Baby who came to redeem us will thrive and grow in our grandchildren and their children. I pray that in all the silly traditions, that the important ones will remain forever. My prayer for our family is found in 2 Samuel 7:29: Now therefore, let it please You to bless the house of Your servant, that it may continue before You forever; for You, O Lord GOD, have spoken it, and with Your blessing let the house of Your servant be blessed forever.
Merry Christmas to you. I pray that the traditions of your family will have purpose in building a unity with you and your children for years to come.
~~~~~~~~~~~~~~~~~~~~~~~~~~~~~~~~~~~~~~~~~~~~~~~~~~~~~~~~~~~~~~~~~~~

About Tonya: I am wife to Mike and mother to 6 delightful children plus one amazing daughter-in-law. We live life loving the Lord and each other. 


You can read more about her and her lovely family at: www.TheVirtuousWife.com

and visit her online store: www.FruitfulVineCreations.com


Moss Planter Candle Pot 
These are so simple and fast to make! We didn't even spend an hour making them, and they are gorgeous in the window. I think I want one in every window.


Supplies:
6"- 8" Tapers - Your choice - we used beeswax sheets and rolled our tapers. Slightly fatter than a normal taper and very festive!
2 Terra Cotta planters - medium sized
White paint/contrasting paint
Stencil brush
Preserved Moss

You can paint these any way you want to. I liked the sponged look. Here is how I did mine:

1. Using a stencil brush, paint by dabbing the paint all over the planter for the first coat. Go down about an inch or so inside the pot. Don't use sweeping motions, unless you want that look. Let dry. These dry fairly quick because the coat is so light.

2. Dab again, using the second color. Let dry.


3. Dab again, using the white, but don't go up onto the rim, leave the second color as dominant on top.

4. Put a dab of glue around the edges of the bottom of the candle, and place in the planter. Push the moss in tight around the bottom, then loosely on top.


You're done, and it's so pretty!! I thought about varying Christmas colors for each room. Have fun!

~~~~~~~~~~~~~~~~~~~~~~~~~~~~~~~~~~~~~~~~~~~~~~~
Now for the giveaway and blog hop!

Follow the steps in the Punchtab box below. You need to be a newsletter subscriber in order to qualify to win. The winner will be notified by email.


Saturday, November 30, 2013

The Five Days Christmas | Day 1 | Dotty Christmas Burlap Runner

Welcome to The Five Days of Christmas!

This week will consist of several things: fun, simple projects, recipes and wonderful giveaways! And... an opportunity to share your Christmas blog posts with us! 

Today through Friday we are going to have a Christmas Blog Hop going, and we would love for you to share your blog! Make sure to follow the guidelines for the hop. Make sure to thank the link participants when you visit their blog! And always read to the very bottom - you never know what you might find!


This part is really going to be fun... 

Old Time Radio Theater!

Every day we will include:
A story a day, all from 1939-1947! 30 minutes to an hour long and perfect for the little ones to have a break from modern media.

MP3 format. Right-click the link - choose SAVE LINK AS and download to your computer. Enjoy as you would any other MP3!

Today's audio story:

A Christmas Carol by Lionel Barrymore - 1 hour long


Today's Giveaway...

One 2013 subscription to Seasons at Home Magazine


and something to sip while you read it...


How exciting is a Starbucks gift card and magazines? My Enter below in the Punchtab box to win today's giveaway! Go through the Punchtab steps at the bottom of the post, and the more steps you complete, the more entries you get!

Please share this event with your friends!!

~~~~~~~~~~~~~~~~~~~~~~~~~~~~~~~~~~~~~~~~~~~~~~~~~~~~~

Dotty Christmas Burlap Runner


This is the simplest runner I think I've ever made. I love the big round dots, they remind me of the big round snowflakes in Charlie Brown Christmas. It only took me a few hours, start to finish, and that included taking pictures! So I can testify that this is a project you will finish and have on the table in no time.

Plus, I think there's something therapeutic about weaving twine through fabric. It's easy, monotonous and relaxing. Along with sponging the dots... what grand fun. Dot, dot, dot, dot...

Instructions
Another fun thing about this runner is that you can make it any size you want - long and narrow, or even square! I made mine 17" x 34"


You Will Need: 
~1 1/4 yds. burlap - Plain, color, or patterned (and yes, there are lovely Christmas patterns available!)
~ bakers twine - This is currently available in almost all the craft stores. It's a decorative twine and comes in red/white, green/white, and blue/white. You can also use yarn or crochet thread. 
~ large eye sewing needle and scissors
~ large cutting mat, quilter's ruler and rotary blade
~ 1 1/2" round sponge and 1 bottle white acrylic paint (permanent) 
~ large piece of cardboard (to place under the runner when you stamp it. A large cereal box works great!)


1. Cut a single layer of burlap the size you desire the runner to be. Again, I cut mine 17" x 34". Burlap can be
a little messy to cut! Make sure that the burlap is flat and even on the cutting board, as it tends to shift around a lot, and the edges are straight after you cut them.

2. Find the center point of the two short parallel sides. Estimate the amount of twine you are going to need by running the twine around the edge of one half of the runner, leaving about 18" extra at each starting point as shown. Cut two measures of twine at this length.


3. Thread the needle with the twine, do not knot the end. Insert the needle in the center of the short side, about 1 1/2" from the edge and pull through, stopping to leave the 18" tail. Begin a long running stitch as shown.


Continue the running stitches along the edge, stopping when you reach the center point of the other side, parallel to the one you started on. Trim the twine, leaving an 18" tail.

Repeat the same steps for the other side of the runner. When you are finished, you will have two sides that meet in the middle. Tie a bow!


 If you happen to knock off some of the threads while you are stitching (like I did), you can go back with the quilting ruler and rotary cutter and even up the edges again. I had to straighten mine out a bit.

Now to sponge on the dots! I had bought a package of assorted round sponges (the cute kind with the handles) and chose the largest one, about 1 1/2" in diameter, but you can make them as big or small as you like. I also stamped the dots sporadically, but evenly, on the runner, but you can be precise about this if you wish... I was having fun just stamping dots as I thought they looked pretty!

5. Lay out the cardboard. Fill a paper plate (or other dish you don't mind putting paint on) with a large puddle of acrylic paint. Don't be stingy on this part, I used quite a bit of paint. Dip and dab the sponge in the paint until it's good and wet.

I recommend testing your stamping skills on a scrap of burlap before starting on your runner, just in case.


Keep dotting... and keep the runner on the cardboard, or you will have a polky dot floor. Stop when you have enough. Can you believe that's the end of the project? Let it dry for a little while, and lay it on the table!


So adorable, and so easy! I was very happy with it. :) So go get some burlap and make a runner!

Now for the giveaway...

Follow the steps in the Punchtab box below. And yes, you need to be a newsletter subscriber in order to qualify to win!


~~~~~~~~~~~~~~~~~~~~~~~~~~~~~~~~~~~~~~~~~~~~~~~~~~~~~~~~~~~~~~~~~~~~~


Related Posts Plugin for WordPress, Blogger...