Google+
Holiday Crafts & Recipes! Embroidery Tutorials Recipes for Desserts & Sweet Treats Dinners & Sides Tea and Coffeetime recipes! Like Joyous Notions on Facebook! Connect with Us! Contact Us! Home Join Our Blog Hops!
Shop Joyous Home!
The Homemakers's Resource Guide on Joyous Notions
Showing posts with label Sewing. Show all posts

Saturday, November 30, 2013

The Five Days Christmas | Day 1 | Dotty Christmas Burlap Runner

Welcome to The Five Days of Christmas!

This week will consist of several things: fun, simple projects, recipes and wonderful giveaways! And... an opportunity to share your Christmas blog posts with us! 

Today through Friday we are going to have a Christmas Blog Hop going, and we would love for you to share your blog! Make sure to follow the guidelines for the hop. Make sure to thank the link participants when you visit their blog! And always read to the very bottom - you never know what you might find!


This part is really going to be fun... 

Old Time Radio Theater!

Every day we will include:
A story a day, all from 1939-1947! 30 minutes to an hour long and perfect for the little ones to have a break from modern media.

MP3 format. Right-click the link - choose SAVE LINK AS and download to your computer. Enjoy as you would any other MP3!

Today's audio story:

A Christmas Carol by Lionel Barrymore - 1 hour long


Today's Giveaway...

One 2013 subscription to Seasons at Home Magazine


and something to sip while you read it...


How exciting is a Starbucks gift card and magazines? My Enter below in the Punchtab box to win today's giveaway! Go through the Punchtab steps at the bottom of the post, and the more steps you complete, the more entries you get!

Please share this event with your friends!!

~~~~~~~~~~~~~~~~~~~~~~~~~~~~~~~~~~~~~~~~~~~~~~~~~~~~~

Dotty Christmas Burlap Runner


This is the simplest runner I think I've ever made. I love the big round dots, they remind me of the big round snowflakes in Charlie Brown Christmas. It only took me a few hours, start to finish, and that included taking pictures! So I can testify that this is a project you will finish and have on the table in no time.

Plus, I think there's something therapeutic about weaving twine through fabric. It's easy, monotonous and relaxing. Along with sponging the dots... what grand fun. Dot, dot, dot, dot...

Instructions
Another fun thing about this runner is that you can make it any size you want - long and narrow, or even square! I made mine 17" x 34"


You Will Need: 
~1 1/4 yds. burlap - Plain, color, or patterned (and yes, there are lovely Christmas patterns available!)
~ bakers twine - This is currently available in almost all the craft stores. It's a decorative twine and comes in red/white, green/white, and blue/white. You can also use yarn or crochet thread. 
~ large eye sewing needle and scissors
~ large cutting mat, quilter's ruler and rotary blade
~ 1 1/2" round sponge and 1 bottle white acrylic paint (permanent) 
~ large piece of cardboard (to place under the runner when you stamp it. A large cereal box works great!)


1. Cut a single layer of burlap the size you desire the runner to be. Again, I cut mine 17" x 34". Burlap can be
a little messy to cut! Make sure that the burlap is flat and even on the cutting board, as it tends to shift around a lot, and the edges are straight after you cut them.

2. Find the center point of the two short parallel sides. Estimate the amount of twine you are going to need by running the twine around the edge of one half of the runner, leaving about 18" extra at each starting point as shown. Cut two measures of twine at this length.


3. Thread the needle with the twine, do not knot the end. Insert the needle in the center of the short side, about 1 1/2" from the edge and pull through, stopping to leave the 18" tail. Begin a long running stitch as shown.


Continue the running stitches along the edge, stopping when you reach the center point of the other side, parallel to the one you started on. Trim the twine, leaving an 18" tail.

Repeat the same steps for the other side of the runner. When you are finished, you will have two sides that meet in the middle. Tie a bow!


 If you happen to knock off some of the threads while you are stitching (like I did), you can go back with the quilting ruler and rotary cutter and even up the edges again. I had to straighten mine out a bit.

Now to sponge on the dots! I had bought a package of assorted round sponges (the cute kind with the handles) and chose the largest one, about 1 1/2" in diameter, but you can make them as big or small as you like. I also stamped the dots sporadically, but evenly, on the runner, but you can be precise about this if you wish... I was having fun just stamping dots as I thought they looked pretty!

5. Lay out the cardboard. Fill a paper plate (or other dish you don't mind putting paint on) with a large puddle of acrylic paint. Don't be stingy on this part, I used quite a bit of paint. Dip and dab the sponge in the paint until it's good and wet.

I recommend testing your stamping skills on a scrap of burlap before starting on your runner, just in case.


Keep dotting... and keep the runner on the cardboard, or you will have a polky dot floor. Stop when you have enough. Can you believe that's the end of the project? Let it dry for a little while, and lay it on the table!


So adorable, and so easy! I was very happy with it. :) So go get some burlap and make a runner!

Now for the giveaway...

Follow the steps in the Punchtab box below. And yes, you need to be a newsletter subscriber in order to qualify to win!


~~~~~~~~~~~~~~~~~~~~~~~~~~~~~~~~~~~~~~~~~~~~~~~~~~~~~~~~~~~~~~~~~~~~~


Saturday, August 10, 2013

How to Put in a Zipper

While making dresses for the fall tea, I decided to take pictures and explain how to put in a zipper.  It doesn't matter how many times I put a zipper in, I get confused each time, regardless of the instructions on the zipper pack. I bet that is why you are here too.

Here we go!
1. I'm assuming this is for a dress. Put the right sides of the fabric together where the zipper will be placed.
 Pin in place. On most dress patterns with zippers, you will have a 'notch' to stop at. Pin all the way down to the notch. Do not sew up the back skirt yet, do that after the zipper is in. Believe me, it's much easier. Be sure your back seams match at the waist! You don't want the back to zip up showing  the seams off. See where the black meets the red? Those are your waist seams, get them even.


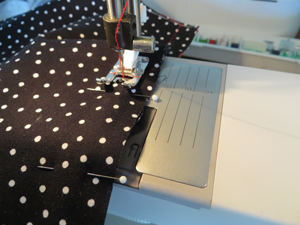
2. Take the dress to the sewing machine and BASTE a 5/8" seam line with your machine. If you don't have a basting stitch, use a double-long stitch.


3. Most zipper instructions just say, "Machine baste opening closed. Press seam open."  Here you see that you put your RST (right sides together). You made a seam by basting to the notch. Press the seam open.


How are you doing so far? It's not too hard yet!

4. Make sure your zipper works! Close the zipper and lay it right side down on the seam, so the zipper lays right on the basted opening. Iron down the extra tape on the zipper at the top (if there is extra), and place about 1/4" under the neck seamline. Using clear tape, tape in place all the way down to the notch. Regardless of the instructions, this works the best.

5. Turn the dress right side out carefully. Use a matching thread and a zipper foot for this step, and change to your straight stitch. If you don't have a zipper foot, just be careful to 'feel' where the zipper is so you don't sew over it. You can start at the bottom where the skirt is open if that is easier.

Start sewing at the notch, sewing straight up to the top, on the right, stop 2" before reaching the pull. I cut the thread and carefully scoot the dress back to the bottom instead of turning the dress. Sew the left side, stop 2" down from the pull.


6. I now have a sewn line on each side of the zipper. I need to finish the top and bottom and I do this separately so I don't make a mistake.  At the top, pull out some basting stitches and open the zipper down to where you stopped to get it out of the way - that is why you stopped by the way. It will push your foot off a bit making the line crooked. Finish sewing to the top, back stitching to secure.


7. Now move to the bottom.  In this step you sew across the zipper to finish off the 'rectangle' and secure the bottom in place. Turn the dress to the side and simply connect the bottom. If you are wondering why you can't start at the top, go down, turn and go up - you can. I did it this way because I didn't want my zipper to move off from the tape. You can baste the zipper and then sew, but I didn't want to sew the zipper in place twice.

Zipper is in place!

 8. Now finish the skirt bottom. With the dress inside out, put the skirt back pieces right sides together. Pin in place. Start where you stopped at the notch. Just make sure your seam isn't pinched anywhere. Sew a 5/8" seam.


Here is a picture of where I started. In the 50's they used pinking shears for seams. These are play dresses, so I took the easy route for the skirt seams.


9. Now, pick out the rest of the basting stitches. Make sure all the tape is off before trying to zip the dress down. Change your needle on your machine. It will be sticky from the tape.

Finished!!

Wednesday, March 13, 2013

March Embroidery Stitch Lesson - Cast On Stitch

We have a March embroidery stitch lesson for you! Each month we will share a new stitch to encourage your work in embroidery. Some stitches will be advanced, others very beginner. Enjoy!

Today, the stitch is the Cast On stitch. This stitch can be used a variety of ways, the most popular way is a bullion flower, but today, we'll learn to make a simple leaf. This is a little more creative than just using a chain stitch for leaves!
This stitch is worked on top of the fabric.

1. Start by drawing a leaf. The stitch will not fill this fatter oval, it's just a guide. Bring the needle up where you want the top of the leaf to be. Make sure you have enough thread, 14", before starting.


2.  Bring the needle in at the bottom of the leaf, and come back in where you came up. Bring the thread under and around the needle...


3. Now, wrap around your finger, holding the bottom thread with your thumb, place your finger close to the needle, and cast on.

 4. For a smaller leaf, cast on about 7 stitches.


5. Holding the stitches taut with your middle finger, push the needle through.


6. Pull slightly to the left, then pull down to straighten the leaf. This leaf can be turned slightly, or rounded a bit, it's very versatile.


 7. Now secure with stitch down through. All finished! Have fun!


Finished leaves on my current embroidery project. 


Wednesday, September 12, 2012

Easy Doll Quilt - Free Lesson


If you or your daughter would like to learn basic quilt block construction, here is a simple project for you! Complete with photos and instructions, it's a good beginner lesson. This would make a nice Christmas present.

I recommend ages 10 +, and a little experience at a sewing machine. Feel free to ask questions here. Just download and enjoy!


Thursday, August 9, 2012

Old to New - Southern Belle Quilt Block

I received a wonderful gift from my mother-in-law. An unfinished Southern Belle quilt, plus a stack of already cut and basted Belles, made by my husband's grandmother. Not a great picture here, I took it right from the box without ironing!

The ideas are swirling. The quilt is a queen, and needs the batting, backing and binding. I've thought about picking it out and making 2 quilts instead of the huge queen, which will not fit on any bed we have right now.

There are 4 blocks with basted Belles, and I've decided to make a pillow for each of my girls.  My friend, Kristi, saw there was 'one block for each girl', I didn't even think of it!

Then, I have a stack of about 13 or 14 Belles ready to put on a fabric. I'd love to hear suggestions of colors to use with them, I plan on making another quilt. I'll make the pillows match whatever I do, since it will be in the girl's room.

The fabric is 50's and 60's, maybe 70's. It's been sitting for probably longer than 20 years. I love all the red, orange, pink and yellow in the vintage fabrics she chose. What fun!

It's so much fun to take old things and redo them or make them new. The girls of course love all the ladies with puffy dresses. We'll update when I have a project in swing with them!

Wednesday, July 25, 2012

Joyous Home Summer Journal!

The Joyous Home Summer Journal is ready! If you buy a subscription to both the Joyous Home Journal and Tea Times, you'll receive all four Journals, plus six issues of the Tea Times! 36 pages.
  • The Girl’s Sum­mer Tea
  •  Sum­mer in the Kitchen — fea­tur­ing yummy pic­nic foods such as a rye sand­wich round, refrig­er­a­tor pick­les, mason jar treats, turnovers.
  • Sewing—Sum­mer felt run­ner (video on stip­pling included!), needle­book, sim­ple crayon caddy, and plain to fancy tea tow­els. 
  • Fancier Soap - video on under­stand­ing when the soap ‘traces’ included. 
  • Sim­ple Wood­work­ing for Boys — Flower Press and Wall Shelf
  • Arti­cles of encour­age­ment and some ideas for home­school sum­mer learn­ing.
If you order the Joyous Home Journal plus the Tea Times, you will have waiting in your account: the Spring and Summer Joyous Home Journals PLUS the February, April and June issues of The Tea Times. This year we are offering the 10 issues, for $35.00. That's only $3.50 an issue. (Single issues of the Joyous Home Journal are available.) We hope you'll join us!

Saturday, December 3, 2011

On the 3rd Day of Christmas...

Before our lovely project... the winner of yesterday's giveaway for the Beeginner Learning Cross Stitch Kit ~ Bee Kind is Lily of the Valley! Please email us and send your address! Congratulations!

(Please note this post will be up until Monday - no post for Sundays! All entries can continue through that time, sale is good until Monday also!)


Girl's Simple Bonnet

This bonnet can be used as a nightcap, but with ties and such use caution. A simple play bonnet for your little lady is a better idea! A quick and lovely gift!

15" x 36" cotton fabric - I used white for a simpler look, but pretty calicos work too!
1 yd. 1/2" Ribbon
1 yd. 1/4" Ribbon
Matching Cotton Thread

Tips: When beginning to sew a line, make sure to back up the stitch to lock it in place. You don't want stitches unraveling!

If you have a 1/4" presser foot, this helps to stitch close to the hemline for your top stitching.


1. Hem and press each short side of the fabric 1/4", hem again 1/4".


2. Top stitch both sides in cotton thread, very close to the edge.


3. Turn and press one long side 1/4", then press and hem another 2 1/4". Top stitch in cotton thread. Measure 3/4" from the stitched hem and sew a straight line to make a casing. This is for the 1/2" ribbon.


5. Turn and press the other long side 1/4", then hem 3/4". Top stitch in cotton thread. This is the casing for the 1/4" ribbon.


Here's what we have now:
You can see the extra line on the wide hemmed side for the casing.


6. Attach a safety pin onto the end of the 1/2" ribbon and insert through the 3/4" casing on the 2 1/4" hemmed side. Pull snug to make the front ruffle for the bonnet, leave even amounts of ribbon on each side for the tie. For a larger girl, make less ruffle and leave a longer amount of ribbon.


7. Repeat inserting casing on the other long side and tie a bow snug to making a little circle for the back of the bonnet.


Put it on the little girl and adjust ribbon. To make these comfy, it helps to have them put their head back while you tie the ribbon. Done! Very simple and fun for them play in!

~~~~~~~~~~~~~~~~~~~~~~~~~~~~~~~~~~~~~~~~~~~~~~~~~~~~~~~~~

Giveaway Details!

We are keeping the daily giveaway as simple as possible. To enter the giveaway, just leave a comment to that day's blog post and say that you want to be entered in the giveaway - one comment equals one entry. You can earn one additional entry by posting about the daily 12 Days of Christmas blog post on your blog, Facebook (add us, Theresa Powers or Jessica Munday, as friends on Facebook for verification) or twitter. Each day we will draw a winner and announce the winner the following day before the next daily post!

Today's giveaway is our Christmas 2011 Joyous Home Journal!


and the Daily Deal on Joyous Home is...

Seasons At Home Magazine Holiday 2008!
On sale for $5.00 - Regular price $10.00


Related Posts Plugin for WordPress, Blogger...