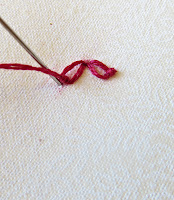
1. To start, draw a slanted line, if it helps, to size your first petal. Come up from the back at the top. We will call this A. Re-insert the needle again at A and come up at the end of the line, with the thread under the needle, to the right - don't pull through yet.
2. Wrap the thread twice in an anti-clockwise direction around the needle tip. Hold the knot with your thumb and put the needle through, pulling to the right. Secure the knot by bringing the needle down to the right of the knot, and this makes a little french knot.
3. For the left petal: Come up again at A. Re-insert the needle again at A, come up at the end of the line with the thread under the needle at to the left - don't pull through yet.
4. As above, wrap the thread twice in a clockwise direction around the needle tip. Hold the knot with our thumb and put the needle through, pulling to the left. Secure the knot by bringing the needle down to the left of the knot, again, this makes a little french knot.
5. Come up right at the center of the two petals. Re-insert the needle at the same spot, emerging at A, with the thread under the tip, pull through. Secure at the top by going back down at A. Done!
I like this flower with the french knots on each petal. It can be turned and added to, put on vines or a single stem. Have fun!


No comments:
Post a Comment